Wanted to know how to make a collage in Photoshop in the easiest and variant way possible? Landed in the right place.
We all know or used many mobile apps or other software for making collages for our pictures. But you won’t wonder if we can create any type of design of a collage in Photoshop.
Collage is mostly used when we took pictures of an event or program. It is the best way to express your picture in an impressive way possible.
Let you’ve had a family occasion, wedding, or trip and you took pictures of that event.
Now, this is the time to make a collage of that event pictures.
There are different ways to make collages in Photoshop as Photoshop is a very wide software but in this article, I am going to show you a variant method of making collages.
This implies that you just need to design your institution once, after which you can import your images and export them. If you later wanted to use that collage for another event, all you would need to do was swap out the images.
As we are using Smart Objects in this tutorial we can anytime double-click the Smart Objects and change the picture.

I am going to teach you how to make a collage in Photoshop like this in simple steps.
So, Let’s Go For It!
Table of Contents
Step 1: Creating New Document
We are going to make a square dimension of document for our college so that we can also use that our Instagram or any social media platform.
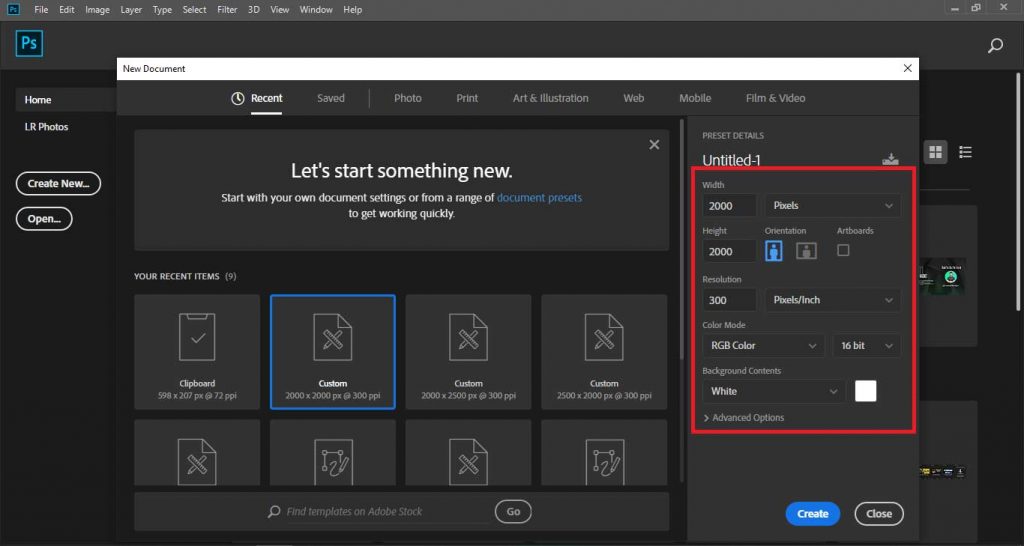
So For this, In Photoshop, go to File > New. Name the document of your choice. Set the file to the following dimensions:
- Width to 2000 px
- Height to 2000 px
- Resolution to 300 px or 72 px
- Color Mode to RGB
Then click Create.
Step 2: Designing Collage
To make this collage we are using squares and circles so we have to make them.
Making Squares:
To make this collage design we need 4 squares and to do so go to Rectangular Shape Tool.
From Rectangular Shape Tool settings select Shape, set Fill color to Black, and set Stroke color to None.

Then click on the canvas.
This will show a dialogue box that asks for the width and height of the rectangle you want to make.
Take width as 990 pixels and height as 990 pixels to make a square.

After making a square arrange the square at the top left corner of the canvas.

Now you can duplicate this square by going to the Layers Panel and selecting Duplicate Layer but you can also make a square with the same methods.
Now make the 2nd square of 990 pixels width and height and place it at the bottom left corner of the canvas.

Then make another 3rd square of 990 pixels width and height and place it at the top right corner of the canvas.
So at last make another 4th square of 990 pixels width and height and place it at the bottom right corner of the canvas.
So we have our 4 squares on our canvas with small space between them.

Making Circles:
Now after arranging the square we need 2 circles of different sizes and to make them go to Ellipse Tool from Tools Menu.
From Ellipse Tool settings select Shape set the Fill color to white and set the Stroke color to None.

Then make a circle by clicking on the canvas and set width and height to 840 pixels and press OK.

Now arrange the circle in the circle of the canvas and to do so select all canvas by pressing Ctrl + A, then go to Move Tool and press Horizontal Centre Align Button and Vertical Centre Align Button.

Then we have to make another black circle by going to the Ellipse tool and from the Ellipse Tool settings, select Shape set Fill color to Black and set the Stroke color to None.
Then make a circle by clicking on the canvas and set width and height to 800 pixels and press OK.
Now arrange the circle in the circle of the canvas and to do so select all canvas by pressing Ctrl + A, then go to Move Tool and press Horizontal Centre Align Button and Vertical Centre Align Button.
Step 3: Converting to Smarts Objects
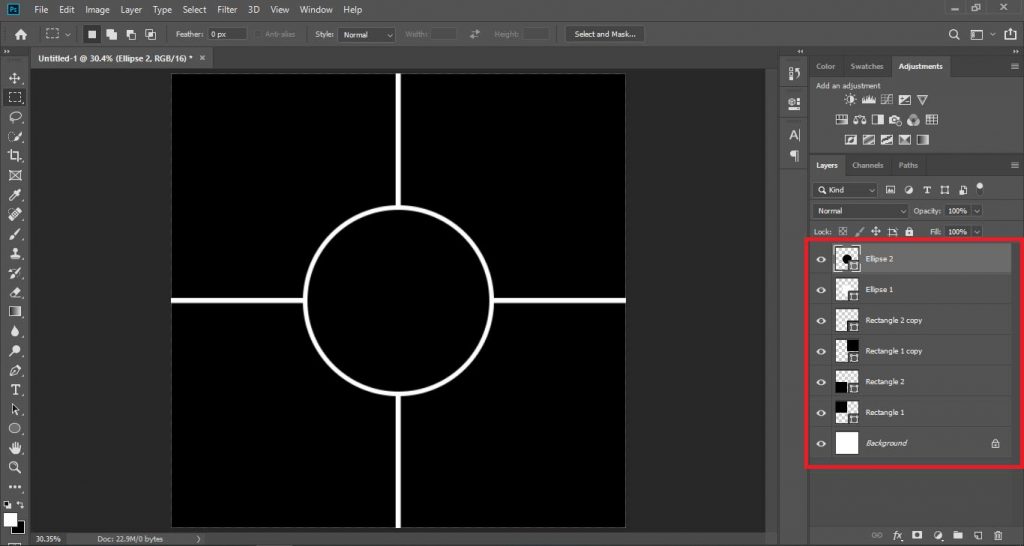
So after making and arranging squares and circles, we have our collage design ready.
So we have to convert all shapes to Smart Objects so that we can use any pictures on them anytime we want.
To do that go to Layers Panel and select one of the squares, right-click on the layer, and select Convert to Smart Objects.

Similarly, do this with all the layers separately to make them smart objects.
Step 4: Placing Pictures
Now we have our collage design ready to use in any situation, we just have to add our relevant pictures on shapes and we do that in this way:
Double click on the thumbnail of First Square which is a smart object now. This will open that square on a separate new document.

Now drag and drop your picture on the document, arrange the picture and press Ctrl + S or go to File > Save to save the file.

This will automatically update this picture on your collage.

Now close this new document and do the same process with the other 3 squares to add images to them.
After adding images to all squares, we have to add images to circles.
Likewise, double click on the black circle thumbnail from Layers Panel and this will open that circle on a new document.

Then place your image on the circle and create an image clipping mask to circle to limit the image only to a circular area and press Ctrl + S to save the new document.

Now this will update the circle on the college document.

This is how to make a collage in Photoshop and we have our college ready to rock!
Related: Learn To Make Icons For Use In Artworks And Collages.
Watch Video For More Info:

I’m a Graphic Designer with 5+ years of experience. Specialized in Adobe Photoshop.
Get Info About Any Photoshop Editing, Photoshop Manipulation, Logo Design, Flyers, Business Card, Cartoon Portrait and any type of work-related to Graphic Design and Photoshop Editing.


