Are you interested in hacking stuff and glitch designs? Wanna know how to make glitch text effect in Photoshop? So you are in right place.
Let’s say we need to design a poster regarding tech-related topics or hacking, and we need to make the text glitchy.
In this situation, we have to learn how we can create glitch text effects in Adobe Photoshop and it is one of the best typography designs.
We can then use that text on our different designs like posters, logos, broachers, or any design you want.
In this article, I am going to show the exact method to create a glitch text effect. After going through this you can create glitch text in just 1 minute.
Just follow the steps I’m going to show you and you are good to go.
Let’s Go For It!
Related: Get to Know Best Tips and Best 5 Fonts for Banners and BillBoards Design
Table of Contents
Creating New Text Effect Document
If you have to create just an effect on a blank black background then you have to create a new document.
In Photoshop, go to File > New. Name the document of your choice. Set the file to the following dimensions:
- Width to 1000 px
- Height to 1000 px
- Resolution to 300 px or 72 px
- Colour Mode to RGB
Then click Create.
Opening Picture In Photoshop
The second condition is that you have a design or picture on which you are going to make this glitch effect.
That First of all, you have to open your image in Adobe Photoshop. For this, you can simply drag and drop on the Photoshop interface to open the image.
You can also go to File > Open on the top left corner.
Making Glitch Text Effect
After getting our document ready, we have to make this glitch effect in Photoshop in some simple steps.
Step 1: Typing The Text
Obviously, we have to type some text on our document firstly to make a glitch effect on it.
To do that click on the Type Tool and take a tech-related font of your choice.
For my design, I’m going to use Azonix Font on my picture.
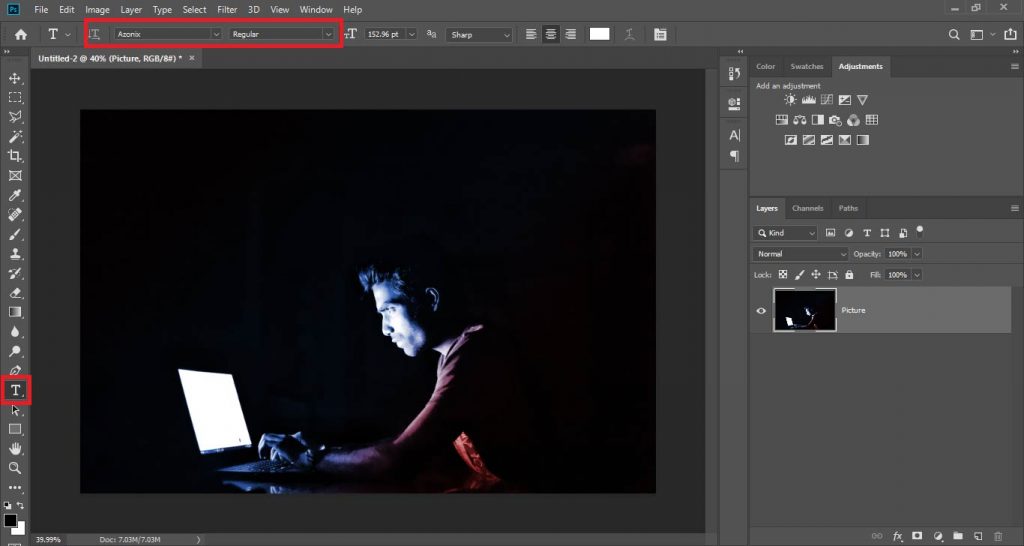
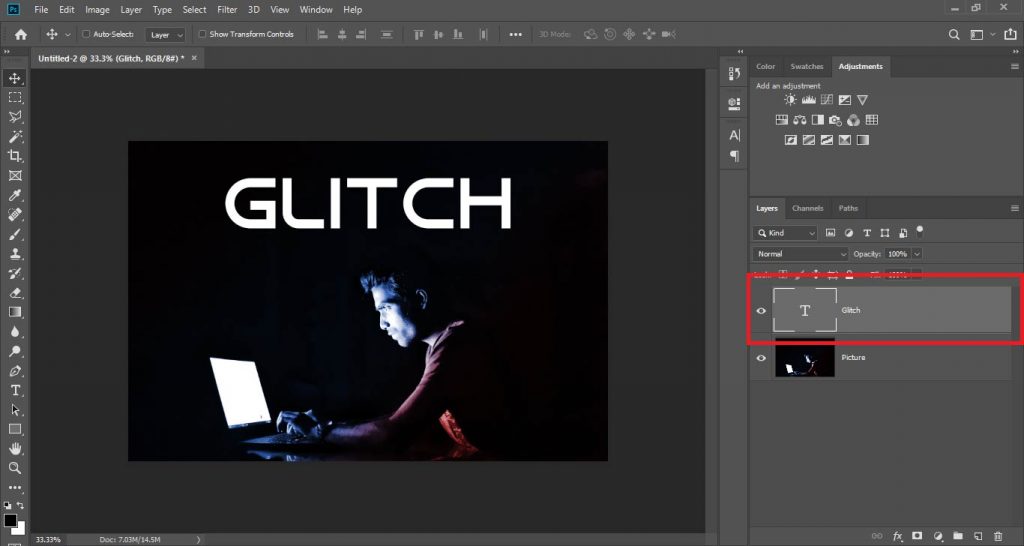
Just click on the canvas and type your text on it.
Take a good size of text and align it properly where you want in your image.
Step 2: Duplicating the Text Layer
After aligning your text on the picture, we have to make two duplicates of the text layer.
One of them will be the blue effect on text and the second one will be the red effect on glitch text.
The thing we have to do is to make a duplicate of our text layer.
Press Ctrl + J (For Windows) or Command + J (For Mac) to duplicate your layer in Photoshop.
After making one duplicate of the layer press buttons again to make another duplicate of the text layer.
Another way of doing this is to go to Layers Panel. Right-click on the layer and click on Duplicate Layer to make a duplicate of that layer.

Step 3: Changing Channels of Layer
Now we have two duplicates layers of the text layer.
Now we have to make one layer to show only its red channel to make it red and the other layer to show its green and blue channel to make it a light blue like color which we see in glitch effect.
In order to do that, right-click on the first duplicate of the text layer and go to Blending Option.

In these options, you will see three channels ticked named R, G, and B in Advanced Blending.
Untick the Green (G) and Blue (B) channel and keep the Red (R) channel ticked.
Then click OK.

Now right click on the second duplicate of the text layer and go to Blending Option.
In these options, untick the Red (R) channel and keep the Green (G) and Blue (B) channels ticked.
Then click OK.

Now we have our two layers of text with different channels.
Step 4: Aligning Channel Layers
We have our channel layers and we have to align them to show the glitch effect.
Select the first duplicate of the text layer, click on Move Tool, and with the help of the right arrow key on the keyboard take the text to a little right to show the red channel on right.

Similarly, select the second duplicate of the text layer, click on Move Tool, and with the help of the left arrow key on the keyboard take the text to a little left to show the blue channel on left.
After doing this, we have our text glitched on channels.

Finalizing the Glitch Text Effect
Now we have our channels shown on the left and right of our text to make it like a glitch but one more thing is to do with it is to make glitches of the text.
The thing is we have to select some lines in the text and move them horizontally to the left and right to make a glitch effect.
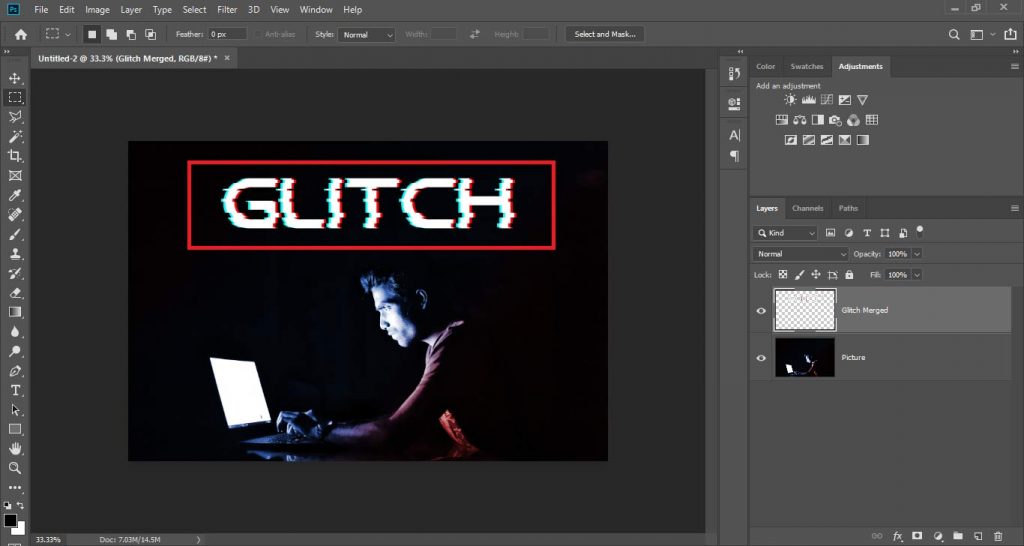
Firstly, we have to convert all three text layers to one layer, and to do that we have to merge the three-layer.
Select all three text layers on the Layer Panel by holding the Ctrl key or Command key.

Then press Ctrl + E (On Windows) or Command + E (On Mac) to merge selected layers in Photoshop.
Now we have our complete text in one layer.
After that, we have to select the Rectangular Marquee Tool and select a line from the text layer as I’ve done in the image.
Selecting a thin line from the text layer.

Then select Move Tool, and with the help of the left arrow key move the selected line to a little left.

Similarly, select one more line and move it to the right with the help of the right arrow key.
Like that select 3 to 4 lines and move them horizontally to the left or right with the move tool to make glitches in the text.
Finally, we have our glitch text effect ready with glitches in it!
Conclusion:
This is the exact process to make glitch effects in Adobe Photoshop. Once you learned these steps you can make any text glitch in Photoshop in just 1 minute.
Subscribe To Our Weekly Newsletter to get awesome updates about our blog, Photoshop and Graphics Designing.
Watch Video For Quick Video Tutorial:

I’m a Graphic Designer with 5+ years of experience. Specialized in Adobe Photoshop.
Get Info About Any Photoshop Editing, Photoshop Manipulation, Logo Design, Flyers, Business Card, Cartoon Portrait and any type of work-related to Graphic Design and Photoshop Editing.


