If you changed your mind about your logo color and have to make that look more stunning and catchy by using another color in it so this tutorial is for you because we are going to learn how to change the color of logo in photoshop this article.
We can do this on Photoshop very quickly instead of getting stuck to only one old boring color. There are a variety of simple color-changing techniques in the program, and they work exceptionally well for logos.
In this software, we can add or change colors in any way we want them to be.
The simplest and most straightforward approach to modify the colour of a logo is to apply a Color Overlay if the logo is solid and has a transparent background, indicating that it is in PNG format.
We need to make sure it’s a PNG file with a transparent background before we try to change the color of a logo in Photoshop. That means that there’s no white background attached to the logo itself.
Related: Learn How To Make Logo Background Transparent in Photoshop.
First, make sure our logo is a PNG file with a transparent background then we can add any color to it by going to Blending Options of that layer and applying Color Overlay.
After having our logo with transparent background in photoshop, we can follow the methods given below to change the color of our logo.
Let’s Go For It!
Table of Contents
Method # 1: How To Change Color Of Logo In Photoshop Using Color Overlay
If our logo is of solid color like one color or there is no gradient or pattern in our logo then the color overlay method works best if we want to apply a completely different color to our logo.
This means if our logo is white and we want to make it red, then using a color overlay will be the easiest. This technique directly applies the new color over our logo, so there’s not much refining involved.
For this technique having transparent background is crucial so with our logo opened in Photoshop, first, make sure it has a transparent background. We can easily tell by looking at the logo’s layer thumbnail. In this case, there is no white behind the logos thumbnail, only a grey, and white checkerboard. This indicates it’s transparent!

Step 1:
Simply we have to right-click the logo layer and click on the Blending Option to open our Blending Options or Layers Style Panel.
A new window will appear called the Layer Styles Dialogue Box.

Step 2:
From these all styles, look for Color Overlay and apply it by simply clicking on it.

If your settings didn’t automatically change, simply click on the words Color Overlay to reveal their settings.
Step 3:
Now in the settings of Color Overlay, we have to make sure that its Blending Mode is set to Normal and Opacity to 100%. We can change these values but it totally depends on we how we want to play around with colors.

Then click on the color overlay box where the current color is shown.
A color palette will appear that we can choose any color we’d like from.
We can click anywhere on our canvas to sample a color if we want to copy a certain color in our image.
After we have a new color picked, click OK to apply the color overlay to the logo.

Finally, we have our newly colored logo made with the help of Photoshop.
Isolate Where The New Logo Color Is Applied
If we have text in our logo as I do, it’s unlikely that we want everything to be the same color. In this case, I only want the emblem to be the new color while the text remains untouched.
With the help of a layer mask, we can also do this separately.
First, we have to duplicate our logo layer by selecting it and pressing Command + J (Mac) or Control + J (PC).
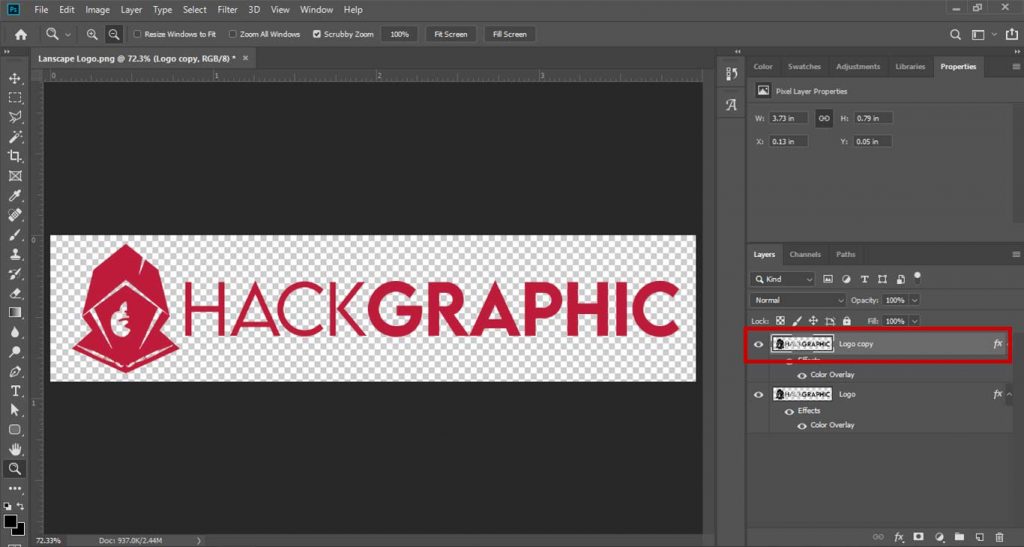
Then we have to select our new layer and right-click on the FX icon and choose Clear Layer Style.
Our logo will be converted back to normal, while the underlying layer has the color adjustments added.

Now we can erase our logo part and leave the text part in a duplicate layer to make it black. But we have to do it non-destructively so that we can change it after.
So to do work non-destructively we will use layer masks so add a layer mask to the duplicated logo layer.
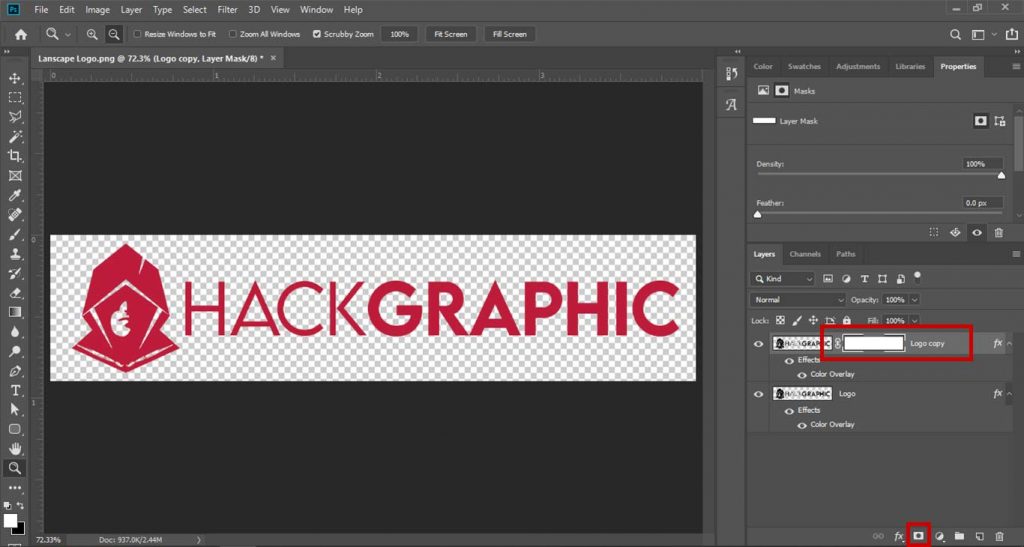
Then select the Brush Tool (B) and set the foreground color to black.
With the layer mask selected, we have to begin to paint over the parts of our logo that we want the color to appear.
In my case, I’ll paint black over the icon of my logo. This will make that area of the layer transparent, allowing the newly colored logo from underneath to show through.
Once our mask adjustments are made, we have successfully changed the color of a logo selectively!
We can use this same process for adding a secondary color to our logo as well. Rather than deleting the layer style, we can update the color overlay, then use a layer mask so it only appears in certain places.

Method # 2: How To Change Color Of Logo In Photoshop Using Hue/Saturation Adjustment
If we have a logo with multiple colors or having a gradient or pattern in logo shape so we cannot add a solid color because it will change the whole design of our logo. For this, we have Hue/Saturation Adjustment Layers.

The hue/saturation method works best if we want to make mostly hue adjustments to our logo. This doesn’t work very well for changing black or white into color. However, it works extremely well for turning one color into another color.
The black or white color won’t change with this type of adjustment.
Follow the steps to do that:
Step 1:
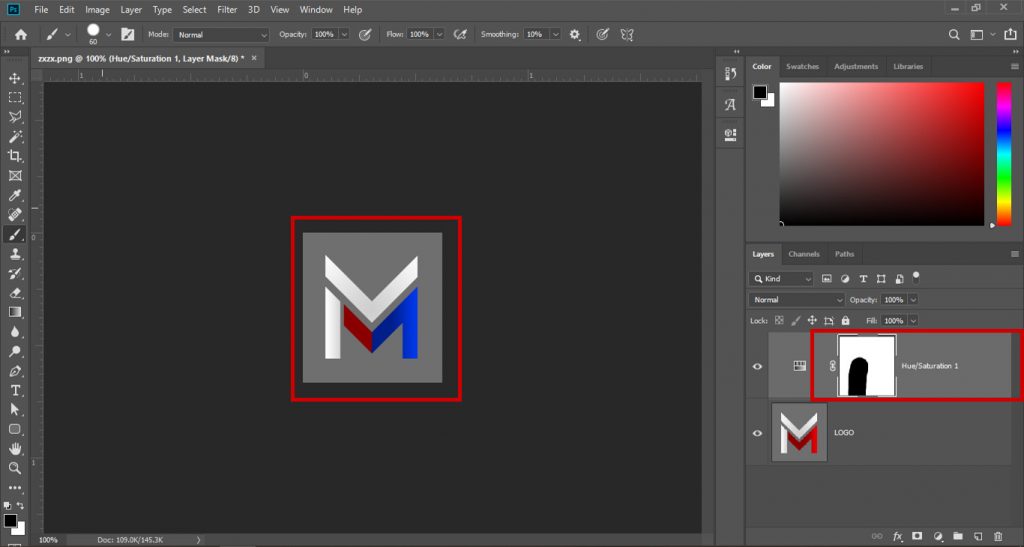
First, go to Layers Panel and create a new Hue/Saturation Adjustment Layer above the logo layer.
We can create this adjustment via the adjustments panel or the bottom of the Layers panel.

Step 2:
The first thing we see when we open the hue saturation adjustment layer is the Master tab. This is home to all the global hue, saturation, and luminance adjustments for our logo.
As we want to change color, so we can start by adjusting the hue slider to change our logo’s hue i.e. color.
To customize the color even further, we can also adjust the saturation and luminance sliders as needed.

With only two steps, we’ve changed our logo’s color with the hue saturation adjustment layer in Photoshop!
When we only want to change colors while leaving blacks or whites untouched, this is the easiest method.
Selectively Apply Hue Adjustments To Our Logo
Let’s say we have two colors in our logo, but we only want these hue adjustments to affect one of the colors.
It is easy because we are using adjustment layers and we already have layer masks, we only have to brush black on the areas where we don’t want to change color.

I’m a Graphic Designer with 5+ years of experience. Specialized in Adobe Photoshop.
Get Info About Any Photoshop Editing, Photoshop Manipulation, Logo Design, Flyers, Business Card, Cartoon Portrait and any type of work-related to Graphic Design and Photoshop Editing.


